
Getting started
- In tables throughout the SSG, double-click a row or click the "edit" button to view and edit.
- Dates and times are normally in the web browser's local time zone unless there is a timezone indicated ('Z', 'GMT', 'BST', 'EST', etc).
Quick set-up using placeholders in new SSG instance
New SSG instances are already set-up with placeholder suppliers, SMSCs, SMSC groups, routing profile, pricing plan and service. This allows you to start sending messages sooner. Update placeholder SMSC configuration with your own supplier SMSC details and then set-up a customer and SMPP account. Watch the video below to show you how to do this.
Video showing how to connect to a supplier's SMS gateway or SMSC, create a customer SMPP account, and send a message. Unedited and in realtime from logged-in to message sent in under 3.5 minutes.
- In Suppliers > SMSCs section, update configuration of the existing "Sup-A-SMSC-1" SMSC with system ID and password from https://melroselabs.com/services/smsc-simulator/. Click Save button once changes made.
- In Customers section, click on Quick Create Customer+SMPP button and complete wizard as for step 6 in "Full set-up of new configuration" (below).
- In Customers > SMPP accounts section, click SMPP Client button and enter the system ID and password of the newly created SMPP account into the system ID and password boxes of the SMPP Client. Click Connect.
- Enter mobile number in Destination box and click Submit. This will then cause the "Hello world!" message to be submitted to your SSG instance using the new customer SMPP account. The supplier SMSC in this case is a simulator and delivery will only be simulated (i.e. not actually delivered to mobile). A delivery receipt will show in the SMPP Client window 3-seconds after submission.
Full set-up of new configuration
Includes set-up of supplier, SMSC, SMSC Group, routing profile, pricing plan, service, customer and customer SMPP account.
1. Add Supplier and SMSC
SMSC connections are associated with suppliers who are either MNOs or SMS gateways.
2. Create SMSC Group
An SMSC group contains SMSCs that provide the same service (coverage and capability) at the same cost.
- Read Create SMSC Group
3. Create Routing Profile
Routing profiles contain SMSC groups that provide a route to a network, and how SMSCs are selected for handling messages.
4. Create Pricing plan
A pricing plan contains the pricing that you charge to your customers, how that pricing is calculated and the payment terms.
- Read Create Pricing Plan
5. Create Service
A service is what customers use and comprises a routing profile and a pricing plan.
- Read Create Service
6. Create Customer and SMPP account
Click on Customers and then Quick Create Customer+SMPP.
Follow the wizard to add organisation name and country, contact information and service. Set the email address to be your own for creating an account for you to test.
Once complete, the wizard will cause an email to be sent to the customer contact with the SMPP details of the new account.
The wizard is configured by default to create a prepay account with 100 SMS credits. The balance of the account can be viewed and modified in Billing | Account balances. See Customer Account Credit for changing a customer's account balance.
7. Send test message
Use the SMPP details emailed in the above step to send a message. The message will be routed via the SMSC set-up above.
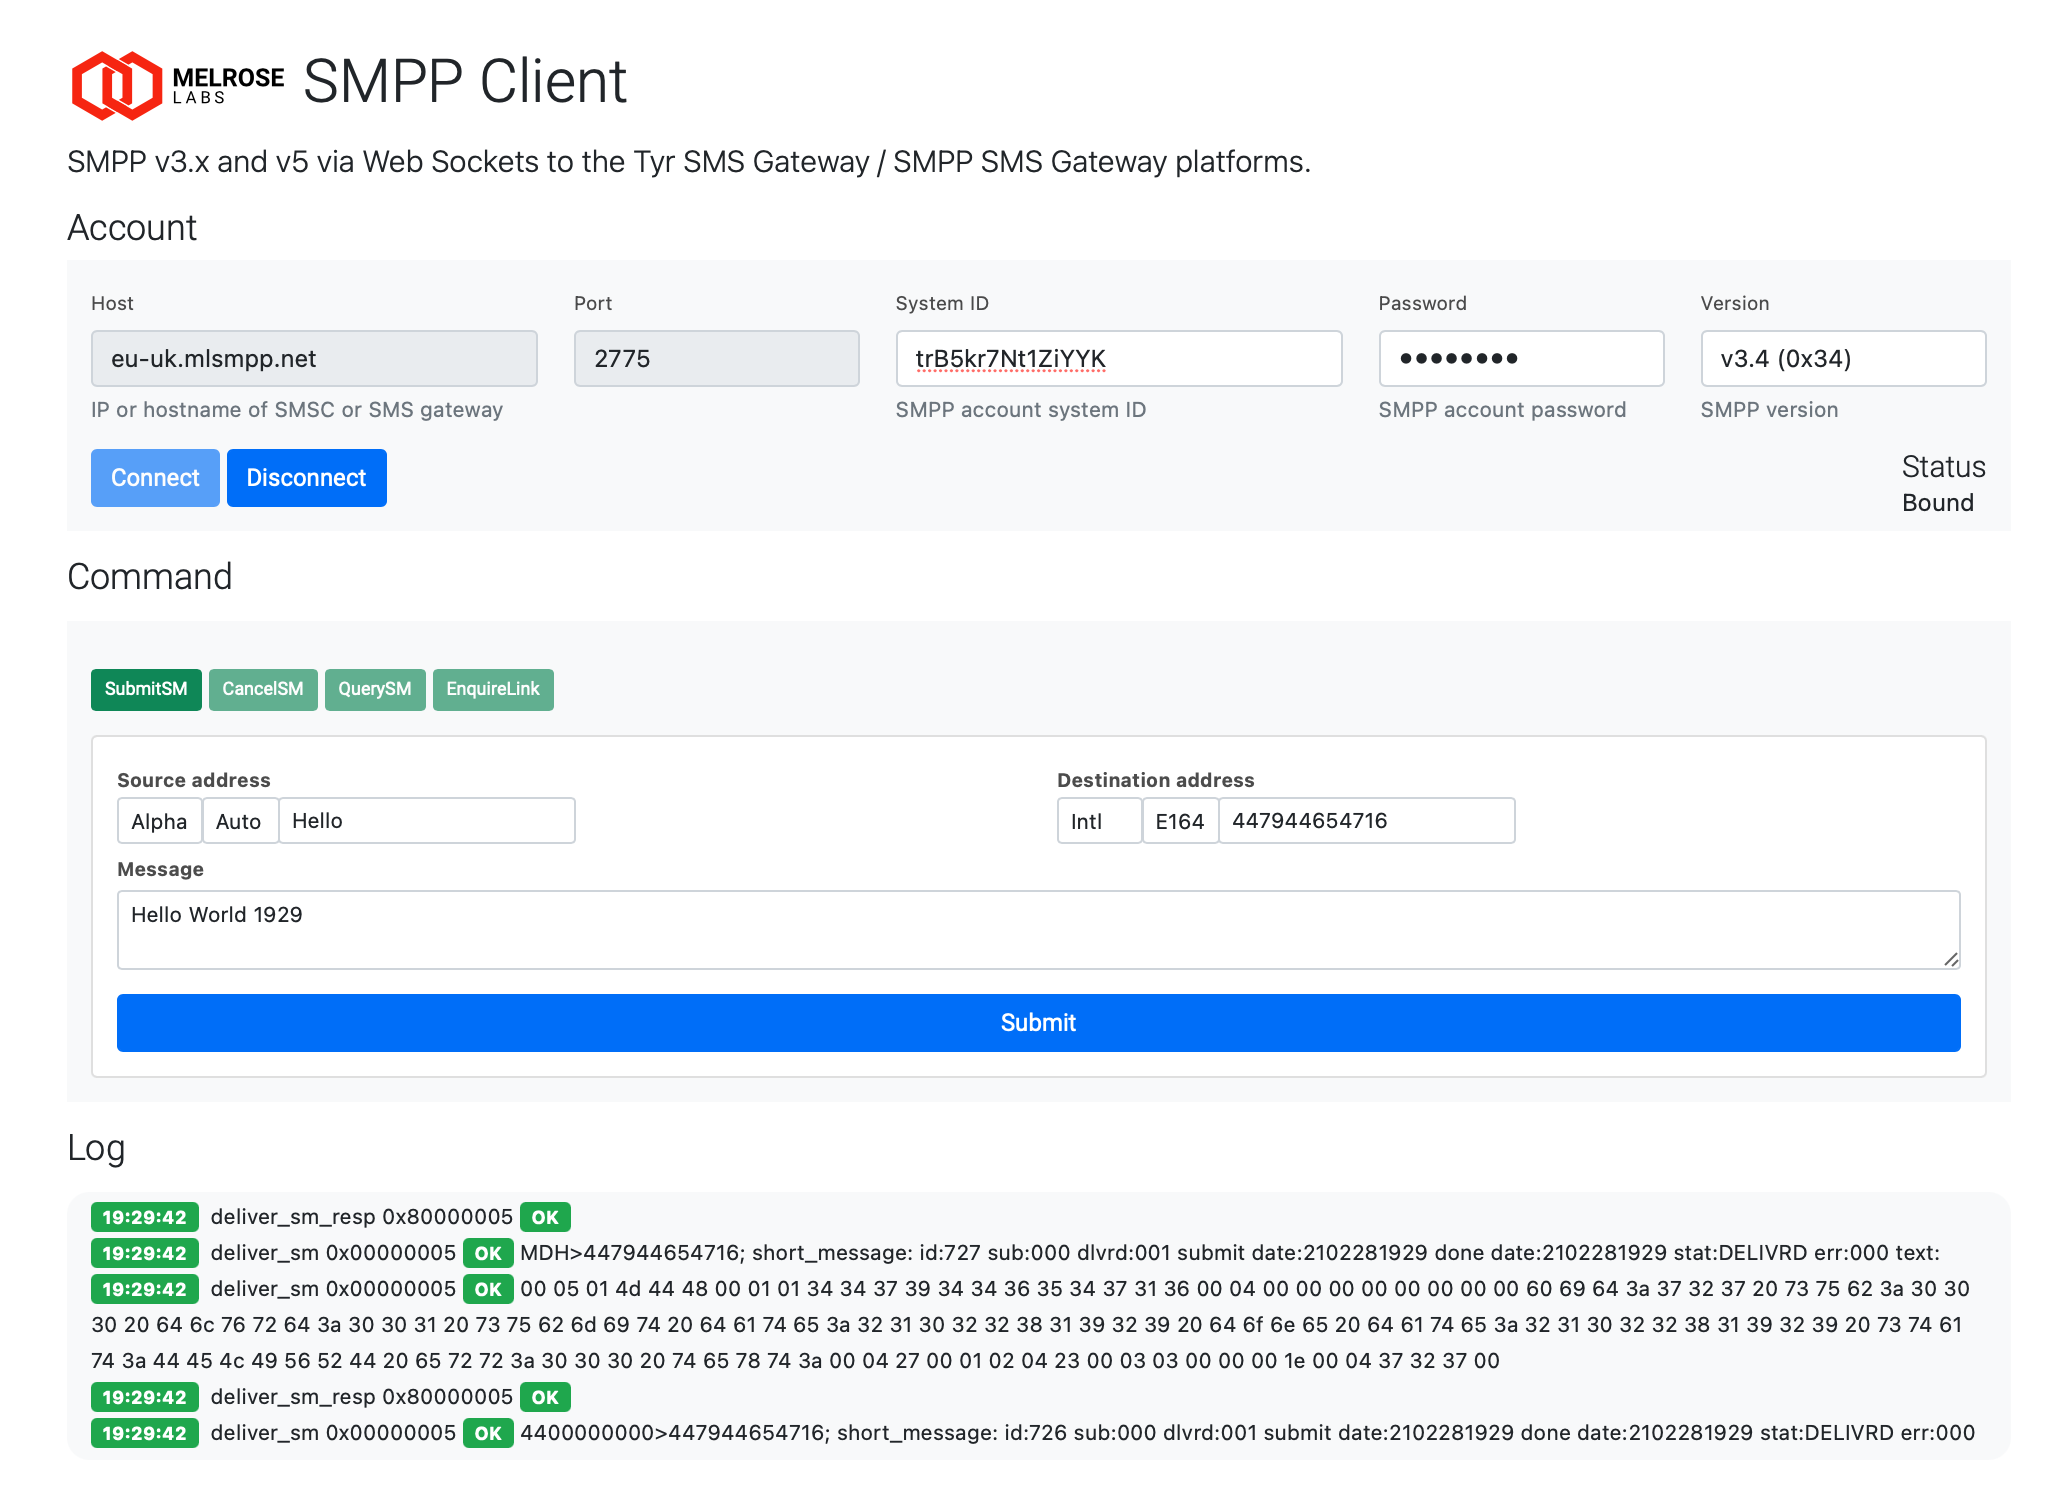
Testing can be performed using software supporting SMPP. Use your own software, send programmatically using code samples at https://melroselabs.com/docs/tutorials/sms/send-sms-with-smpp/, or use our web-based SMPP client at https://melroselabs.com/tools/smppclient/ (screenshot below).
In the SMPP SMS Gateway portal, Status | Message lookup can be used to show the status of the message. The message status will also be indicated in the Dashboard and Reports.